

Looking for some epic surf photography gear for shooting all the surfing action from the beach? Here’s what’s currently in my kit bag….
When it comes to surf photography gear, there’s plenty of options out there for all styles and of course budgets.
You can easily spend thousands on lenses and camera bodies, so doing your research is well worth the time and effort.
So here’s my full surf photography gear guide and what I’m currently using for all my land based shooting – for both photos and video…
And if you’re looking for in water surf photography gear, check out my full guide here.
Surf Photography Gear Guide – My Land Based Setup
Contents
Camera Body
Sony A7IV
I’ve recently upgraded my gear to the Sony A7IV, which to be honest was mainly driven by the 4K 60FPS capability and the full frame sensor.
 At 10FPS in photo mode it’s an epic option for photography as well and after quite a bit of research, for me it was the best balance of both photo and video, without totally blowing my budget either.
With a solid battery life, flip out back screen and huge range of options and customisable buttons it’s going to suit a lot of people out there – both for video and still images.
The tracking in the A7IV is pretty freaking epic too, so whether you’re shooting surfing from the land, or in water it’ll keep your subject tack sharp!
Click here for more info and to buy
If you’re looking for something in the more budget friendly range, then the Sony A6300 and Sony A6000 series in general are a great way to get started without breaking the bank. The Sony A7III is also still a solid option, with plenty of second hand options out there now as well.
Lenses
Sony 200-600mm G Lens
 When it comes to shooting surfers from the beach the Sony 200-600mm is my new go to lens. Even though I’ve only recently added it to my kit bag (both due to size and the overall cost!) it’s been a solid investment and it’s incredible to shoot with.
Although it’s a big chunk of change, it’s certainly incredible value compared to Sonys 600mm F4 G Master Lens which is nearly 10 times the price, plus you get a range of zoom too, which I find super useful.
I did also start out shooting with the Sony 55-210mm lens, then the Sony 70-350mm lens before my final upgrade. These are both great options for those on more of a budget, but do then have a bit more limited reach.
Click here for more info and to buy
Sony 24-105mm G Lens
 A great lens for shooting surf lifestyle shots and a great all round lens, the Sony 24-105mm is a super versatile piece of kit and is consistently voted the “one lens kit” amongst both photographers and videographers.
Great when you don’t need the full zoom and just an all round great lens to have for non surfing stuff too, so it’s certainly one I’d highly recommend.
Click here for more info and to buy
Sony 50mm F2.5 G Lens
 Although I don’t really use the 50mm that much on land (it’s my go to lens for in water surf photography) it’s still really good for portraits and another great value option compared to the F1.8 prime lenses too.
And because of that reason it’s one I always keep in my kit back even if I’ll be based on the beach for the day.
Click here for more info and to buy
Tripod
Manfrotto BeFree, with Liquid Head
Light weight, durable, compact and easy to use, this tripod has been in my kit bag for the last few years. I opted for the video head (aka liquid head) for smoother pans when shooting video, so if you’re doing stills only you could leave that out.
A solid tripod or monopod are a must for the 200-600mm lens, but also a solid shout for any longer beach shooting which can really tire out your arms!
Click here for more info and to buy
Accessories
URTH Filters
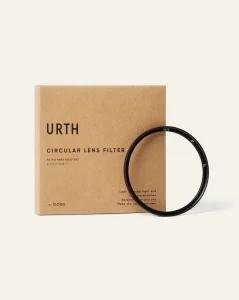 If you’re spending solid money on lenses, it’s a no brainer to screw on a filter as soon as you unpack it!
Shooting surfing means sand, salt spray and dust are a constant issue, so make sure you grab a set of filters before you start shooting.
Circular polarising filters (aka CPL filters) are my go to for shooting surfing, as they boost the colours and take out reflections and glare on the water. But at the very least a UV filter will offer protection to the main glass and it’s much cheaper to replace a filter than a scratched lens!
The URTH filter range are great value, high quality filters and these are the ones you’ll find attached to all of my lenses. They do some great value combo packs too, combining both CPL and UV filters so you can easily change them around.
Click here for more info and to buy
URTH Lens cleaning kit
Alongside the filters I also grabbed a URTH lens cleaning kit to keep everything in tip top shape.
It comes with a cleaning cloth, dust brush, dust blower and lens cleaning spray all in an easy grab bag. A great little accessory pack to chuck into your kit bag.
Click here for more info and to buy
Camera Strap
Even though Sony includes a camera strap, I’ve never found them very comfortable. Another URTH product (a side note, I’m not being paid to promote them, I just love their gear!) the Core Camera Strap comes with a super useful quick release system too.
Plus I find removing this strap system much easier than the Sony strap loop system when stripping down the camera for loading into my in water housing too.
Click here for more info and to buy
Spare batteries
There’s nothing worse than running out of juice mid shoot, or realising you haven’t charged your battery fully before hitting the beach.
And even though the battery life on the Sony A7IV is solid, I’ve always got a spare battery to hand just in case.
Camera Case
You’ll definitely need somewhere to keep all this gear and get it to the beach! When it comes to camera cases I’ve got two main options I swap between.
For soft cases I’ve got the DB Backpack Pro with Camera Insert, which is great for getting from A to B or when you need the convenience of a backpack.
For safer storage and bigger shoots I’ve also got a hard case with a foam insert, which is where everything lives at home as well. I opted for an Amazon Basics hard case (which came with customisable foam inserts) which came in a lot cheaper than Pelican hard cases, although they probably aren’t as waterproof.
The medium size easily fits my camera body, 50mm, 24-105mm, spare battery and the 200-600mm too.
Click here for more info and to buy – DB Backpack Pro
Click here for more info and to buy – Amazon Hard Case
SD Cards
You’ve got to make sure you have somewhere to store all the awesome content you’re shooting, so a solid SD card is a no brainer. For the A7IV I’ve gone with the Sandisk Extreme 300MBPS to take full advantage of the 4K and fast frame rate shooting it offers.
It costs a chunk more than lower write speed, but makes video and photo work that much faster and smoother so it’s well worth the investment.
Click here for more info and to buy
External Hard Drives
More storage solutions! This time external hard drives so your laptop doesn’t get nuked by gigabytes of files!
The Sandisk SSD drives are my go to – super compact, lightweight and with super fast write speeds, they make backing up your files super easy.
I’ve got a couple of 1TB options for main storage, with a 500GB one which I use for all my Final Cut Pro video editing, which takes the pressure of my laptop memory.
Click here for more info and to buy
Photography Settings
So what surf photography settings am I using?
Well, on the Sony A7IV I’ve used the custom photo modes to save my most common shooting setup so I can quickly get to the beach. These are as follows:
- Shutter = 1/1000 (or 1/800 in lower light conditions)
- Aperture = Anywhere between F5.6 and F10 (depending on the depth of field I want)
- Shutter Mode = Hi+
- ISO = Auto
- White Balance = Auto
Essentially with the above I’m taking control of the shutter speed (a must for freezing all the action) and F Stop (keeping it mid range for good depth of field) and then letting the ISO be the variable, with the camera doing the work with that side of things. I do have it slightly controlled with a min ISO of 100 and max ISO of 3200
I will of course play around a bit depending on the time of day and type of shot I’m wanting to get, lowering the shutter speed slightly for sunset/sunrise (usually min 800) or playing around with the F Stop to get some nice effects with the depth of field.
With shutter mode for those action packed shots I’ll use Hi+ to take full advantage of the burst capabilities of the A7IV, but I may also lower it to Hi or Mid if I don’t want to snap so many frames, and as a result I’ve setup one of the custom button functions on the camera to allow easy access to this.
Focus Mode
Now this is the setting that caused me the most issues and I think I’ve finally nailed what works for me when it comes to focus mode on the Sony A7IV!
I’m currently using the focus spot, large, usually centred, but moving around with the joystick depending on how I’m framing things. This works great for both in water and land based shooting and the ease of moving the focal point with the joystick means I can get creative with framing without any issues.
Focus mode is also set to AFC (continuous auto focus) so whether you’re shooting still or video, anything in that focal point will be nice and crisp.
I’ve also got the Human AF option turned on with this too and it seems to track surfer subjects pretty freaking well.
All of the above works really well with both photography and video shooting too, so I can easily switch between them without any major adjustments being needed.
Happy days!
What surf photography gear and setting do you use?
What’s on your wish list?

Leave a reply