
Ever dreamed of living the van life? Thinking about taking on a Toyota HiAce camper conversion and heading out on some epic road trips?
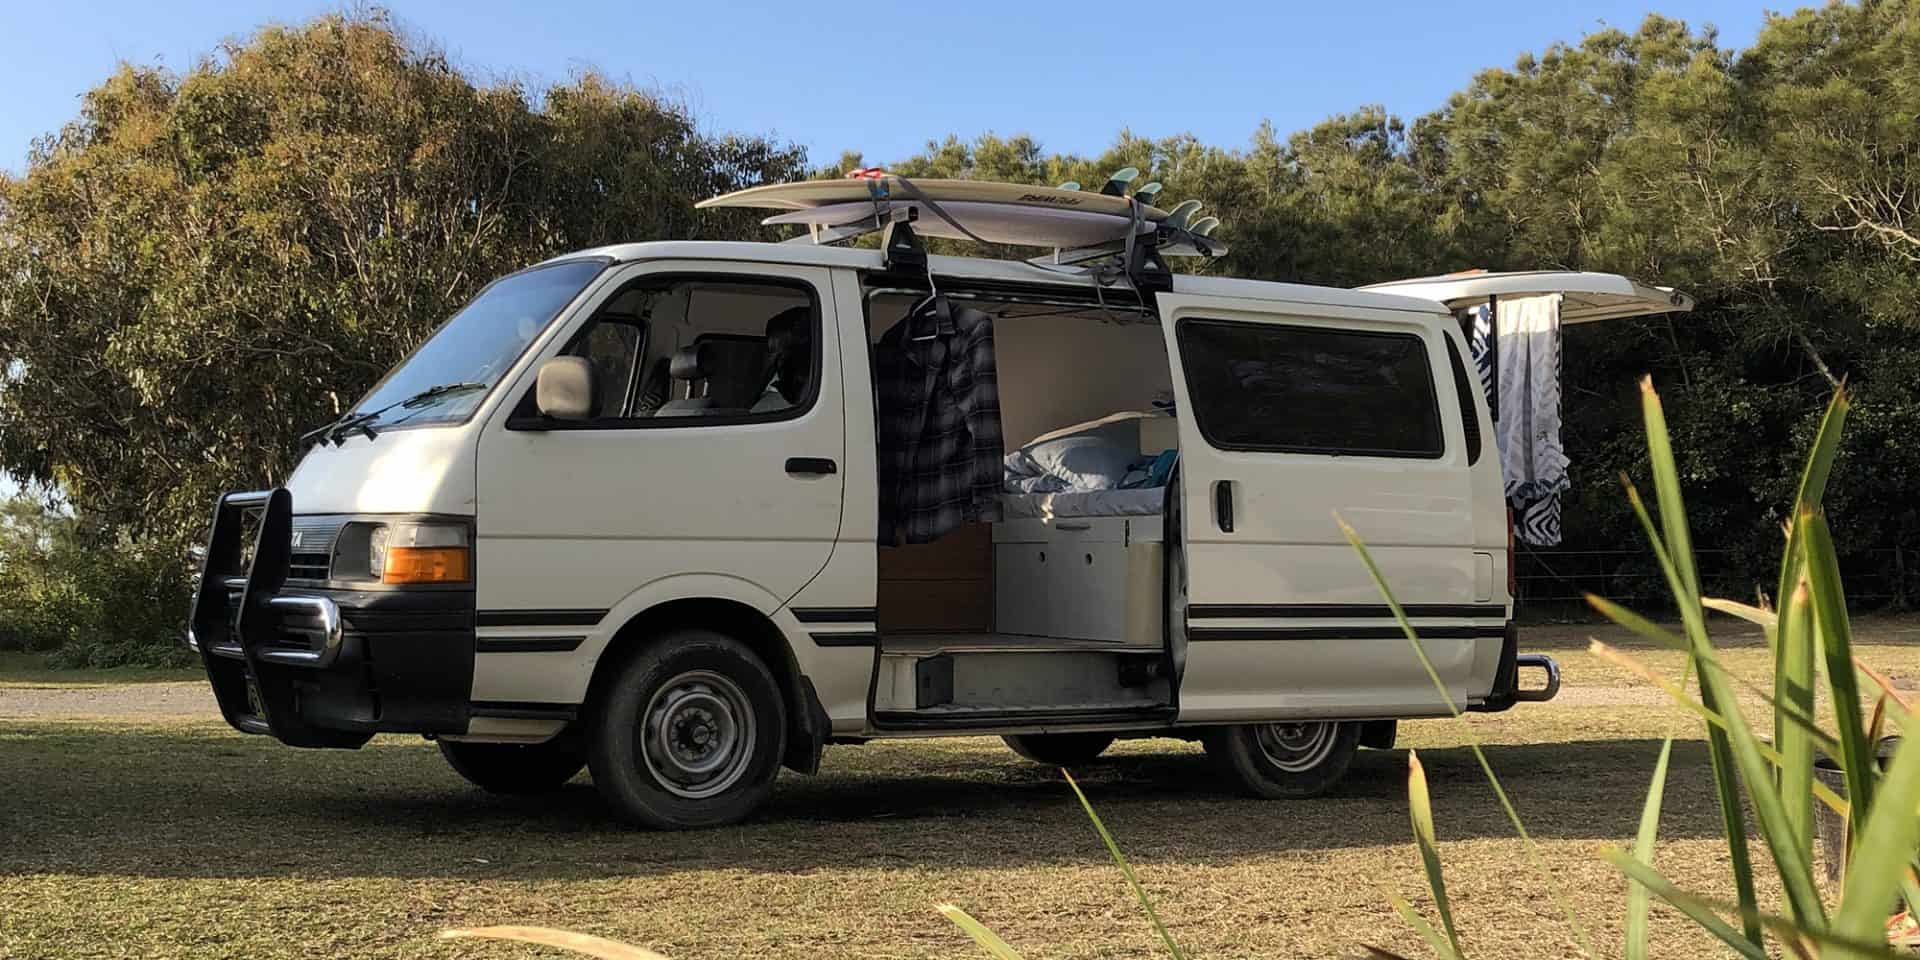
Well during my time in Australia I decided to do just that and took an old Toyota HiAce and with a little help turned it into an epic tiny house to live the Campervan dream!
My 4 Day Toyota HiAce Camper Conversion
Contents
Where Did I Find My Van?
Well since I was based in Australia at the time the best place to locate a van to convert is Gumtree – where you can easily filter through ads by van type, make, price and of course location.
There are plenty of options out there – and if you’d rather get one already done up there are plenty of backpacker camper vans for sale on there too, as well as a heap of Facebook Groups for those selling vans.
How Long Did The Build Take?

Once I got started on converting the campervan the whole thing was actually pretty quick as I already had the layout I wanted all planned out – from the type of bed setup I wanted to placements of draws and even a hidden fold out desk!
With the help of Sean from SL Kitchens (an epic carpenter I hired to help out) the inside build took just over 4 days, with the solar installation (which I did a few weeks after) another half day.
So basically 5 days from start to finish.
…not bad hey?
What Was The Cost?
The overall cost for the build worked out just shy of $2,675
This included;
- Hiring Sean
- Ply insulation (6mm on the ceiling, 12mm on the walls and 12mm on the floor)
- Wood for the bed frame, draws and cabinet
- Vinyl panels for floor and ceiling (the ceiling turned out to be a big mistake but more on that later!)
- Paint
- Foam bed mattress
- Assorted fixtures and fittings (draw runners, curtain rails, screws, etc etc)
The solar setup I went for was then an additional $880 (a detailed breakdown of that is further on), + $100 for the roof bars
I then added in some extra splurges like black out curtains ($150) and finishing touches like beddings etc for around $150
And on top of this the original purchase of the van was $2,300AUD.
All in My Toyota Hiace Camper Conversion was a $6,265AUD project
Extra Costs and Splurges!
I went a bit mental and also spent around $150 on some pretty pricey black out curtains which I then got tailored to fit (since I have zero sewing experience and no equipment!) but you could easily cut that cost down!

On top of that I then spent money on bedding, LED lights etc – but your budget on that side of things comes down to personal taste.
I probably spent about another $300 with all the bits taken into account.
So an extra $450 of the overall cost was for the finishing, personalised touches
One of the 2 other splurges I made (which I was very glad I did) was the push to open draws on the main cabinet (which made everything flush and streamline) which were $17 a set (3 needed), as well as heavy duty runners for the back pull out draws – so I could store everything I needed for van life – which were $56 a set (2 needed).
This made them run super smoothly and stable, so I didn’t have to worry about how much I stored in them.
We even stood in the fully extended to test them out!
I then also added latches to all the pull out draws so they didn’t slide around whilst I was driving – which caused a heap of frustration to begin with!

Hiring Sean was certainly the best investment I made with the Toyota Hiace camper conversion – his expertise as well as the professional equipment made the whole process so much smoother.
Yeah I could’ve done the whole thing myself for much cheaper – but it would’ve been a LOT more stressful and ultimately it would never have looked as good!
Plus it would’ve taken a lot longer too!
His labour did set me back $1,200 which stung a bit at the time but honestly was the most sensible option and I don’t regret it in the slightest!
Overall though the solar setup was the biggest chunk of cash in terms of building and the setup I bought via 4WD Supa Centre set me back just under $880
Well worth it though as this took me off the grid and easily handled all my charging needs.
Campervan Solar Setup
In terms of the solar setup I went for, I decided to keep it as a closed circuit – which meant it wouldn’t effect the van battery in the slightest.

I also added in an inverter, so I could easily charge my laptop, phones, gadgets etc using normal plug sockets rather than USB chargers. It’s something I’d highly recommend but it did set me back around $200 of the total solar cost.
So my total campervan solar setup included;
- Deep Cycle Battery 115AH
- 1500W Pure Sine Wave Inverter
- IP68 Waterproof Solar Regulator
- 160w Solar Panel
Plus I then wired in a 6 socket extension cable as my charging point and picked up a roofrack for $100 from the local scrap yard.
If I was to do everything again I’d also add in digital display to show the input, output and remaining charge on the battery just for peace of mind.
That being said though we kept heavy charge loads (like laptops etc) for daytime when the solar was producing heaps of charge and then the evenings we limited it to charging phones and powering the low energy LED lights.
What Would I Do Differently Overall?
Well I think the biggest thing I’d change would actually be the van itself!

Ultimately I would’ve gone for the high top, long wheel base version of the HiAce – especially if you’re looking at living in it long term.
The extra height certainly opens up a lot more options in term of storage but would also be heaps more comfortable. I’m 6 foot so bending over and moving around inside the van wasn’t the easiest task, especially once everything was shut up for the night!
In terms of building, I’d also have avoided using vinyl on the ceiling too. Although it looked great in the Aussie heat it became a freaking nightmare and all peeled off, despite using contact adhesive as a double up for fixing them on!
In the end I simply removed them all and replaced them with a painted wooden panel.
This ended up costing about $50 instead of the $300+ worth of panels I initially used on the roof!
Gutting!
I’d also try and get a van with sliding windows on the side too and install mozzie mesh on them – which would allow for a much cooler night time setup, especially in the hot summer months in Oz.
My Toyota Hiace Camper Conversion Video Edit
Want to see how me and Sean put everything together and how it all looked? Well I filmed the whole thing so hit play and check it out!


Hey really cool conversion.
Is the bed setup ok that way or would you change that to make it longer?
Hey Tim!
The bed is extendable and as a 6’0 dude I still had plenty of room to stretch out! If you made the bed any longer it would overlap the sliding door and eat up too much space, so it’s a good way to utilise the space you have. If I could do it all over again I would get a LWB if possible as it does offer up a bit more room to play with.
Hi van looks cool.. I’ve always fancied the idea of converting a van I’m abit of a diy handy man so I know I would enjoy it my on reservation is the van itself mechanics is not my strongest point and I see alot of converted vans have access of 150k miles on them how do u know what’s a good enough old van with life still left in it
Cheers
John
Hey John, stoked to hear you’re looking to convert a van and have some solid DIY skills. Personally I’d recommend getting a mechanic to check everything over before you buy and do your research on the best van type as well. I went with the HiAce as they’re known to last forever and parts/repairs are super cheap in Australia as they’re so popular too.
Hi. I just bought a hiace comnmuter. I am not a handy man so I was actually pleasantly surprised the carpenter was so cheap to get all that done.
Can you tell me more about the insulation you used? And if you woukd change any of it? Did you insulate the subfloor, roof and walls? I will mostly be using my van in South East Queensland. Thanks.
Hey Tomas, good choice on the Commuter – upgrading to that would’ve been my biggest change! Insulation wise I kept things pretty simple – just using standard foil/metallic insulation (easily grabbed at Bunnings) for the flooring and walls) then the ply straight over the top. If you’re sticking with the heat of Queensland I would also look into adding ceiling fans as well – especially for the hotter months.
The other major change I would’ve done was NOT using the vinyl on the ceiling, as it all peeled off!haha!
Hey mate, i read this article but as I am at work I am unable to watch the videos so my apologies if the answers to y questions are already in there. I’m curious about the original van purchase. How many k’s were on the clock, what sort of condition was the van in, rust, dents, etc.
Anyway, the van looks amazing, i’d buy it off you in a heartbeat. I’ll watch the videos later.
Have a great day.
Daniel
Hey Dan!
Bought the van a few years back – before COVID and rocketing second hand van sales!haha! Picked it up at a really good price, was about 250,000km on the clock and in pretty good condition. Was used by a tradie who had looked after it pretty well and didnt need much in the way of servicing.
Honestly the biggest issue with doing a conversion now if finding an unconverted van without a ridiculous price tag!
Hello,
I am in the process of converting a LWB hiace. I currently have 12mm ply sub floor, and currently deciding what to use for the walls and ceiling. I was thinking that 12mm may be unnecessary for the walls/too heavy? Did you find it to be okay in terms of weight?
Hey Paula,
Stoked to hear you’re converting your van! For the ceiling I used pretty light ply, but I matched the wall panels with the flooring thickness for both insulation and because things like the surf rack, cupboard and table were all bolted to it.